Dynamics AX 2012 Excel Add-in – Tracking Dimensions
Purpose: The purpose of this document is to illustrate how to work with Tracking Dimensions in Dynamics AX 2012 Excel Add-in.
Challenge: Data model changes in Dynamics AX related to high normalization and introduction of surrogate keys made import of data more complex. Additionally there are number of differences between Excel and AX Rich Client from UI standpoint when it comes to handling Inventory dimensions. AX Rich Client is obviously more dynamic comparing to Excel. AX Rich Client has a number of specialized classes to support Inventory dimensions related operations and UI.
Solution: Dynamics AX 2012 ships with the number of AIF Web Service which can be used in integration scenarios. However not all of them can be used in Excel at the moment for import of data. In order to manipulate with Tracking Dimensions using Excel the appropriate tables can be used. In my example I’ll import required Tracking Dimensions, then import Purchase Orders information and specify Tracking Dimensions related to Purchase Order line.
Data Model:
| Table Name | Table Description |
| InventBatch | The InventBatch table contains information about batches. |
| InventSerial | The InventSerial table contains information about the serial numbers of items. |
| InventDim | The InventDim table contains values for inventory dimensions. |
| InventSum | The InventSum table contains information about the present and expected on-hand stock of items. |
Data Model Diagram:
Inventory Dimensions

Red area highlights tables forming Product Dimensions data model
Green area highlights tables forming Storage Dimensions data model
Blue area highlights tables forming Tracking Dimensions data model
Tracking Dimensions

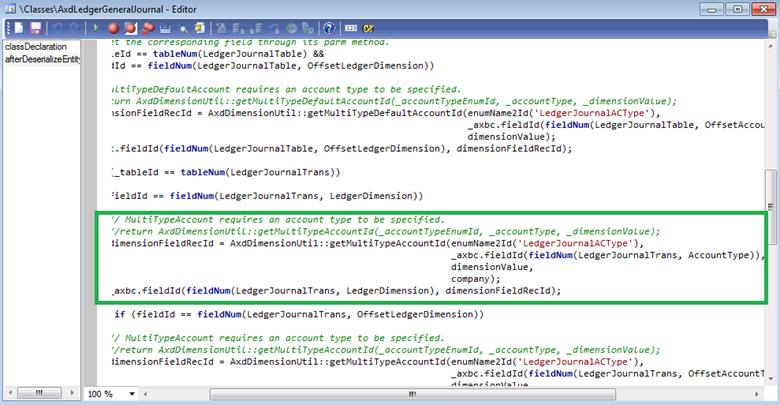
In Rich Client when Inventory Dimensions are specified, for example, on Sales order line or Purchase order line the system will automatically create InventDim table record and allocate InventDimId value if specified combination of inventory dimensions doesn’t exist in InventDim table yet, otherwise existing InventDimId which corresponds to the specified combination will be re-used. This means that the system will not create InventDim table record for the combination which is not yet used. If you create Sales order line or Purchase order line programmatically using X++ you would use Tables\InventDim\findOrCreate method to assign proper InventDimId to SalesLine table buffer or PurchLine table buffer.
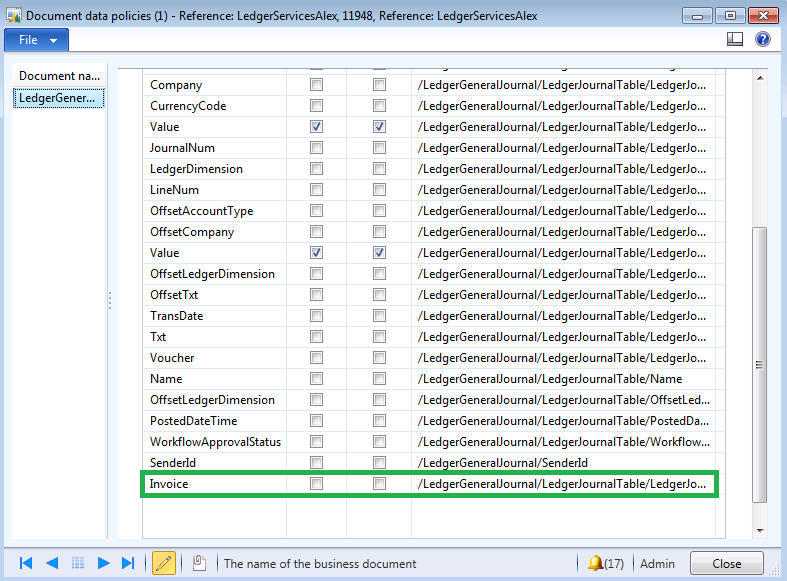
In Excel Add-in there’s no dedicated control related to InventDimId EDT (InventDimId field) yet to enable automatic creation of InventDim table record based on Inventory Dimensions - “segments”. I would anticipate that we have something similar to Excel Add-in segmented control for DimensionDynamicAccount EDT (LedgerDimension field).
| InventDimId field lookup | LedgerDimension field lookup |
| | |


If you modify AutoLookup field group in InventDim table to include {InventDimId, ConfigId, InventSizeId, InventColorId, InventSiteId, InventLocationId, WMSLocationId, WMSPalletId, InventBatchId, InventSerialId} fields then you can get full list of Inventory Dimensions displayed on Excel Add-in lookup form, however you will still have to specify existing InventDimId before you can create Sales order line or Purchase order line for specific combination of Inventory Dimensions.
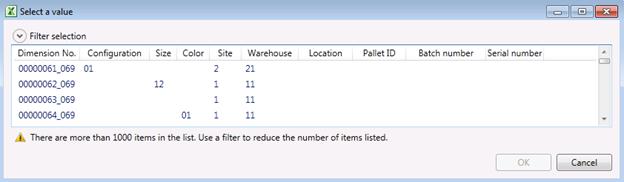
In order to resolve this problem appropriate combinations of Inventory Dimensions will have to be created upfront and then Excel VLOOKUP function can be used to pull out the particular InventDimId and apply it to specific Sales order line or Purchase order line.
Excel Add-in can be used to create combinations of Inventory Dimensions in InventDim table.
Alternatively you can write X++ job that will programmatically create desired combinations of Inventory Dimensions for you. Please see the example of X++ job below

Tracking Dimensions in Dynamics AX 2012 are Batch number and Serial number.
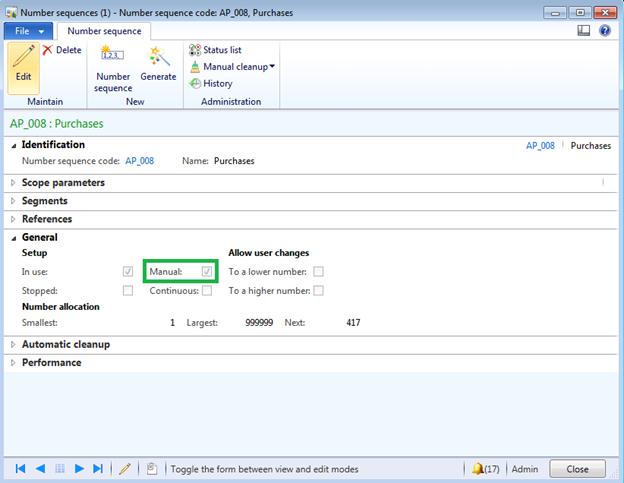
Please also note that Batch number and/or Serial number may be automatically assigned by the system based on Batch number group and/or Serial number group setup.

For example, you can set up the system to automatically assign Batch number on receipt inventory transaction upon physical update as shown above. The structure of Batch number or Serial number itself can also be defined and it may consist of {Date, Reference No., Lot ID, Number sequence No.}.
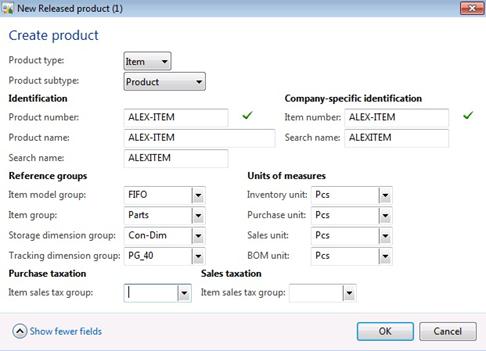
For the purpose of this walkthrough I created new released product “ALEX-ITEM” with the following inventory dimensions activated {Site, Warehouse, Batch number, Serial number}
Tracking Dimensions Walkthrough:
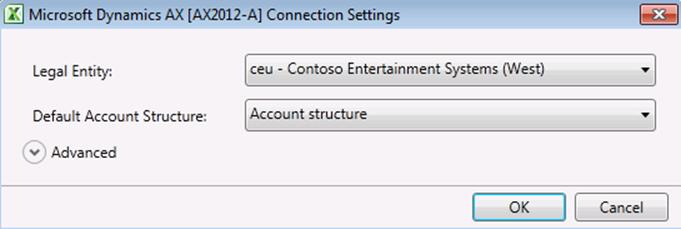
Connection

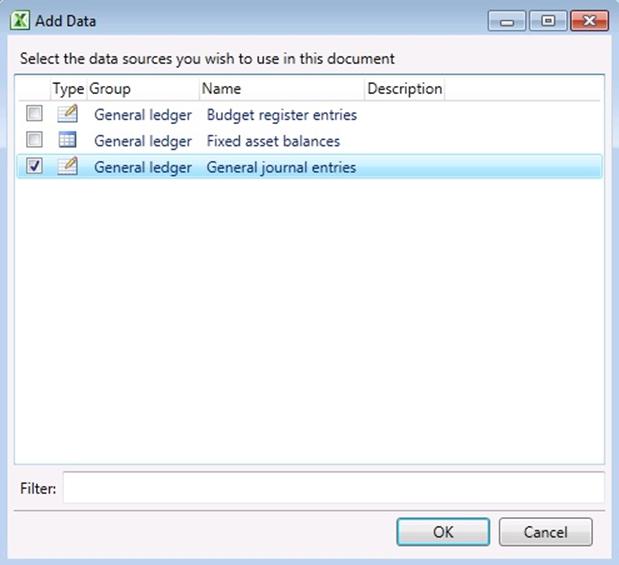
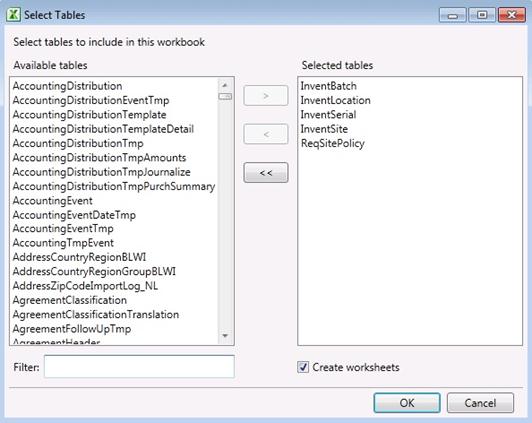
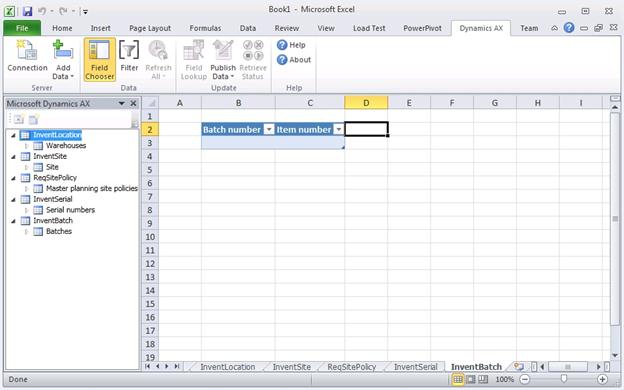
Add Tables
Field Chooser
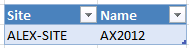
InventSite
| Field Name | Field Description |
| | Site |
| | Name |
SiteReqPolicy
| Field Name | Field Description |
| | Site |
| | Use transfer journals for movements within site |

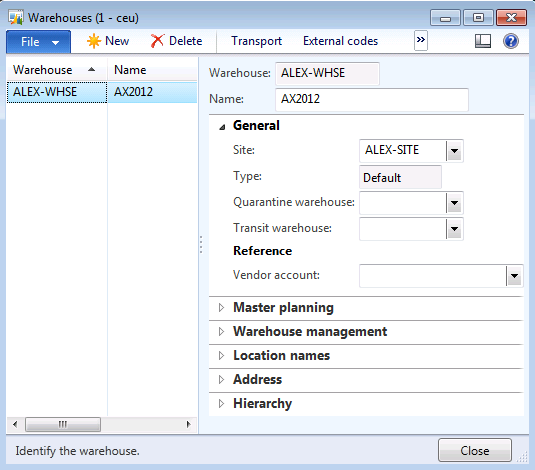
InventLocation
| Field Name | Field Description |
| | Site |
| | Warehouse |
| | Name |

InventBatch
| Field Name | Field Description |
| | Batch number |
| | Item number |
| | Manufacturing date |
| | Expiration date |

InventSerial
| Field Name | Field Description |
| | Item number |
| | Serial number |
| | Manufacturing date |

Sequence:
1. InventSite – Publish Selected
2. SiteReqPolicy – Publish Selected
3. InventLocation – Publish Selected
4. InventBatch – Publish Selected
5. InventSerial – Publish Selected
Result
Dynamics AX – Site

Dynamics AX – Warehouse
Dynamics AX – Batch number

Dynamics AX – Serial number

Add Tables

Dynamics AX – Error

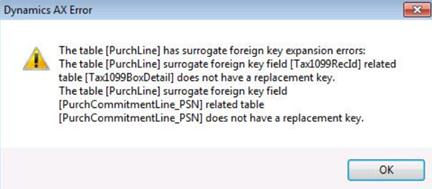
Resolution:
1. Add replacement key {AgreementClassification, RecId} in AgreementHeader table
2. Add replacement key {ImportId} in Tax1099RecId table
3. Add replacement key {ImportId} in PurchCommitmentLine_PSN table
Please note that ImportId is custom string field
Field Chooser
InventDim
| Field Name | Field Description |
| <unbound> | Combination |
| InventDim.InventDimId | Dimension No. |
| InventDim.InventSiteId | Site |
| InventDim.InventLocationId | Warehouse |
| InventDim.InventBatchId | Batch number |
| InventDim.InventSerialId | Serial number |
Please note that I added unbound Combination field into Ax_InventDim table

Combination field is simple concatenation of 4 strings {Site, Warehouse, Batch number, Serial number} with “” delimiter in the middle. This field will be used in VLOOKUP function during the import of Purchase Order lines in order to put correct InventDimId value in PurchLine.InventDimId field.

Usually when you are doing Data Import you either don’t have InventDimId easily accessible or you do by opening Table Browser or another Excel tab with InventDim table data, and ultimately anyways you’ll have to copy and paste InventDimId value into, for example, PurchLine.InventDimId field.
In fact you will always have an information about what Site, Warehouse, Batch number and Serial number (in my example) this Purchase Order line should be associated to even not having InventDimId value.
That’s why I’m going introduce similar Combination field in Ax_PurchLine table to compare it against Combination field in Ax_InventDim table and automatically put required InventDimId value in PurchLine.InventDimId without a need to manually do copy and paste.
Publish Selected – InventDim
Result
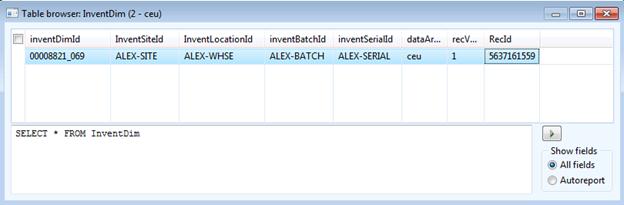
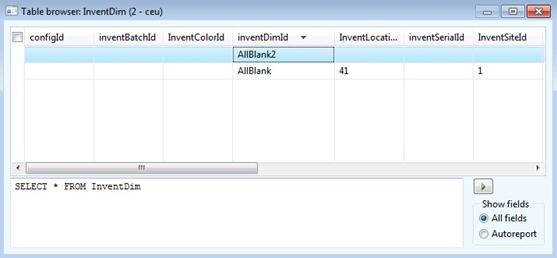
Dynamics AX – Table Browser
Purchase order ID number sequence
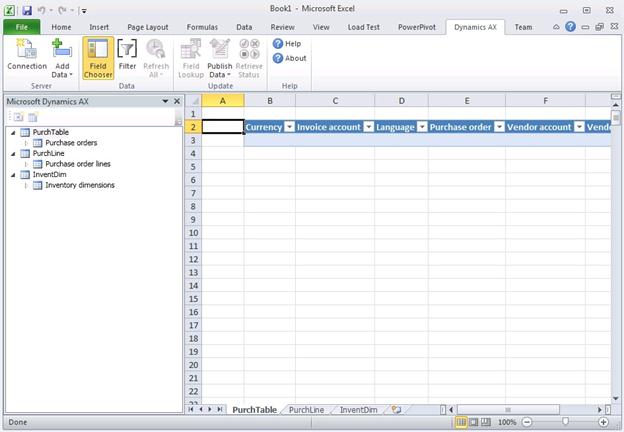
PurchTable
| Field Name | Field Description |
| | Currency |
| | Invoice account |
| | Language |
| | Purchase order |
| | Vendor account |
| | Vendor group |

PurchLine
| Field Name | Field Description |
| <unbound> | Combination |
| | Currency |
| | Group |
| | Lot ID |
| | Purchase order |
| | Vendor account |
| | Item number |
| | Quantity |
| | Unit |
| | Unit price |
| | Net amount |
| PurchLine.InventDimId | Dimension No. |
| <unbound> | Site |
| <unbound> | Warehouse |
| <unbound> | Batch number |
| <unbound> | Serial number |


Please note that I added similar unbound Combination field into Ax_PurchLine table. The difference here is that Site and Warehouse fields in Ax_PurchLine table are also unbound. Again, usually you have the information about Site, Warehouse, Batch number and Serial number (in my example) particular Purch Order line should be associated to, but you don’t have InventDimId value itself. This becomes critical when you have a lot of combinations of Inventory Dimensions to be introduced into the system as a part of Data Import which will support Purch Order lines.
Similarly Combination field is simple concatenation of 2 strings {Site, Warehouse} with “” delimiter in the middle and it will be used in comparison against Combination field in Ax_InventDim table in order to put correct InventDimId value into PurchLine.InventDimId field.

Publish Selected – Purchase Line

Please note that bound InventDimId field in PurchLine table has a formula associated that uses VLOOKUP function. This is how we compare Combination fields in Ax_InventDim and Ax_PurchLine tables to find out about correct InventDimId value to be used in PurchLine.InventDimId field.
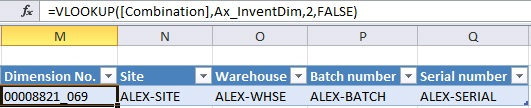
By other words, I’m looking for the value from Combination field from Ax_PurchLine table (1st parameter) in Ax_InventDim table (2nd parameter). If exact match (4th parameter) was found then the value in 2nd column (3rd parameter) will be returned as the result.
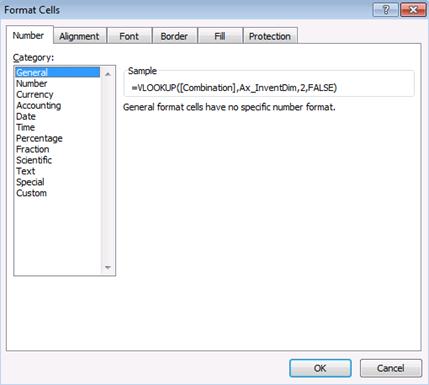
Please note that by default the category in InventDimId field is Text which has to be changed to General to be able to apply the formula.
Please note that there’re number of prerequisites in order to apply VLOOKUP formula correctly.
Important:
1. Combination field has to be left-most field in Ax_PurchLine table
2. No duplicate values are allowed in Combination field in Ax_InventDim table because we are looking for the exact match
3. You can use static named ranges, absolute cells coordinates or table name(s) in Excel to effectively define table_array value (2nd parameter in VLOOKUP function)
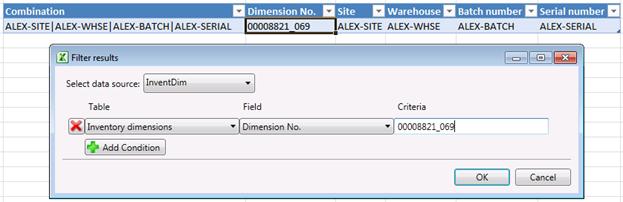
You may define Filter criteria to fetch only certain InventDim table records into Ax_InventDim table in Excel. Consequently it may happen that there’s no match found in Ax_InventDim table, so Excel will put #NA value into the cell. In order to substitute #NA (Not Available) to something more meaningful you can change VLOOKUP formula to be
=IF(ISNA(VLOOKUP([Combination],Ax_InventDim,2,FALSE)),"AllBlank",VLOOKUP([Combination],Ax_InventDim,2,FALSE))
Please note that “AllBlank” represents the record in InventDim table which has no Inventory Dimensions defined
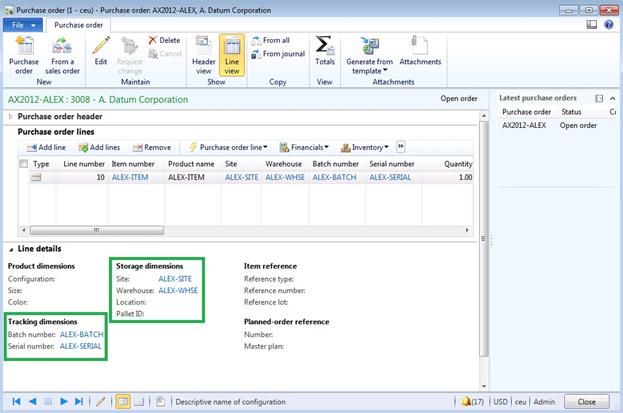
After Purchase Order line(s) information gets published the system will reread the information and display the results to you, consequently you will have a value displayed in InventDimId field in PurchLine table instead of VLOOKUP formula.
Result:
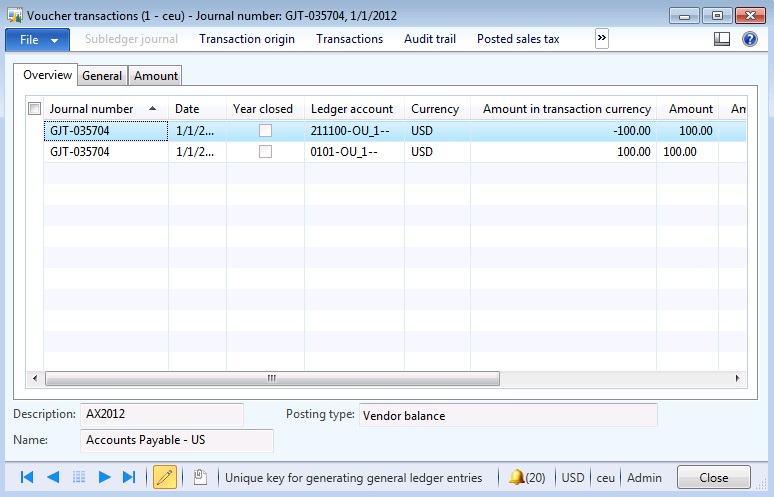
Dynamics AX – Purchase Order
Dynamics AX – Purchase Order Invoice

SQL Trace:
Summary: For the purposes of small or medium data migration (data conversion) where performance is not a concern Excel can be used for import of data into Dynamics AX 2012. Although there’s no AIF Web Service to import Inventory Dimensions combinations (into InventDim table) upfront, appropriate tables can be used instead. Excel template can be created and used for import of data.
Author: Alex Anikiev, PhD, MCP
Tags: Dynamics ERP, Dynamics AX 2012, Excel, Dynamics AX 2012 Excel Add-in, Data Import, Data Conversion, Data Migration, Application Integration Framework, Inventory Dimensions, Storage Dimensions, Tracking Dimensions.
Note: This document is intended for information purposes only, presented as it is with no warranties from the author. This document may be updated with more content to better outline the concepts and describe the examples. It’s recommended that all Data Model changes introduced as a part of this demonstration will be removed once you complete data import exercise.